

Curtain bangs were supposed to be the easy win: soft, face-framing, the fringe that works on everyone. Then the cut comes home stiff and blocky, sitting on the forehead like a helmet instead of falling open at the cheekbone. The difference between soft and dated is never the bang itself. It’s a handful of small decisions made at the chair, most of them invisible until the hair dries. Here are the ones that quietly sink the whole thing, and what to ask for instead.
FYI, thanks to AI imagery software, we’re able to create very specific fashion and hairstyle examples to illustrate the points being made. In some cases, imagery is exaggerated to hammer home the point. Also, assume links that take you off the site are affiliate links such as links to Amazon. this means we may earn a commission if you buy something.
45. Taking the Bang Section Too Far Back

The apex of the triangle is the whole game. Start it too far back toward the crown and you drag a wedge of hair forward that was never meant to live on your forehead. Now the fringe reads dense and flat, and everything behind it looks thinner by comparison.
Soft curtain bangs start their point just a few inches back, no deeper. The fringe should feel like a continuation of the front, not a transplant from the top of your head.
Warning against starting the curtain-bang section too far back toward the top of the head, one stylist and brand co-founder says “This will create a fringe that is super heavy and hard to style.”
44. Cutting an Overly Wide Bang Section

Width is where curtain bangs quietly go wrong. Stretch the section ear to ear and the fringe becomes a bedsheet. It swallows the temples, hides the cheekbones, and that open, parted look vanishes.
A good width lands between the outer corners of your eyes. Narrow enough that the sides can sweep back and breathe, wide enough to actually do the framing. Asking for “more hair up front” turns out to be the exact wrong instinct.
43. Pulling Too Much Hair From the Temples

Temples do more work than anyone credits. Rob them to pad the fringe and you leave two sparse patches right where the face needs softening. The bang looks full, the sides look hollow, and the whole thing tips off balance.
Leave your temple hair largely intact so it sweeps back and softens the hairline instead of getting dragged forward. On fine or thinning hair over 50, those temple strands are precious. Keep them where they do the most good.
42. Cutting the Center Pieces Too Short

There’s a temptation to shorten the center pieces so the fringe “opens up.” It backfires. Cut too short in the middle, those strands sit high on the forehead, stick up, and refuse to join the rest of the curtain. You get a stubby little spray where you wanted a soft part.
The shortest point of a curtain bang should still reach somewhere around the eyebrow or just above. Short enough to part, long enough to lie down and travel with the sides.
41. Leaving the Outer Edges Too Long

One sharp step from short center to long sides is where the dreaded disconnect lives. Leave the outer edges hanging past the jaw with nothing bridging them to the middle, and the fringe reads as two separate haircuts stapled together.
The outer pieces should flow down and melt into your layers, not dead-end beside the chin. A soft diagonal from the center out to the length is what makes a curtain bang feel like one continuous sweep instead of a before-and-after on the same head.
40. Skipping Face-Framing Graduation

Blunt is the enemy of soft. Cut the fringe straight across with no graduation and you get a boxy panel on each side, a hard bottom edge that frames the face like a picture frame nobody asked for.
The whole appeal of a curtain bang is the taper, pieces of varying lengths feathered so they blur into the face instead of stamping a line across it.
Graduation is what turns a fringe into a frame. Skip it and you’ve just cut a flat curtain.
39. Creating a Harsh Shelf Above the Cheekbones

A flat horizontal line that ends right at the cheekbone builds a shelf. That hard edge cuts across the widest part of the face and draws a line exactly where you don’t want one.
Angled, point-cut ends fix it fast. The fringe should sweep past the cheekbone on a diagonal, grazing it rather than parking on top of it. That slight downward angle is the difference between a fringe that opens the face and one that chops it clean in half.
38. Cutting the Bangs While They Are Soaking Wet

Wet hair lies. It stretches long under the comb, then springs up the second it dries, sometimes an inch or more. Cut the fringe soaking wet to the length you want and it dries too short and too high, every single time.
Cut curtain bangs dry, or at least finish them dry so you can see exactly where each piece lands. On textured or gray hair, which tends to spring more, this matters even more.
37. Stretching Wavy Hair Straight Before Cutting

Pull a wave straight with a brush, cut it, let it go, and watch it bounce right up past where you wanted it. Cutting wavy or curly hair under tension is the classic reason a fringe lands shorter and jumpier than planned.
Waves need cutting closer to their natural state so the stylist can see how each piece will actually fall. If your hair has movement, say so, and ask them to work with the wave instead of ironing it flat first.
36. Ignoring a Strong Cowlick at the Hairline

A cowlick doesn’t care about your inspiration photo. Cut the fringe as if that stubborn swirl at your hairline isn’t there, and it will shove one section up and out in its own direction, splitting the curtain and leaving a gap.
Map the cowlick first. How the fringe is sectioned and the direction it’s cut can either fight the swirl or quietly use it, letting that natural lift become part of the soft part rather than a daily brawl with a flat iron.
35. Forcing a Dead-Center Part That Will Not Hold

A dead-center part is the first instinct and the first mistake. If your hair grows with any swirl at the front — and most of ours does by now — a middle split fights the cowlick all day, drifts sideways by noon, and leaves you looking like you forgot to finish.
So move the part a half-inch off true center and follow the direction the hair already wants to fall. The fringe reads soft instead of surgical. And it actually stays put.
As a London salon stylist puts it, “Remember, also, that bangs do not necessarily need to be parted in the middle and that some strands bending in slightly different directions is where the beauty of a cowlick fringe lays!”
34. Leaving the Ends Thick and Untapered

Thick, blunt ends turn a soft curtain into a stiff visor. The weight sits all in one line, so the fringe hangs like a curtain rod rather than a curtain.
Point-cutting fixes it. Vertical snips into the ends break up that solid edge and let the pieces separate on their own. Ask for taper, specifically — the word matters, because a straight-across trim is the default, and the default is heavy.
33. Cutting a Square Shape Around the Face

Square corners around the face age a cut instantly. The eye reads those right angles as hard and heavy, which is the opposite of what a curtain bang is for.
What you want instead is a long diagonal, shortest at the inner part and sweeping down toward the cheekbone. That curve softens the whole front and follows the way your face actually narrows. A rounded frame flatters. A boxed one cages.
32. Hiding the Eyebrows With a Solid Curtain

A fringe that swallows your eyebrows swallows your expression along with them. Your brows frame your eyes; hide them behind a solid panel and the whole face goes flat.
Curtain bangs are supposed to part and open, revealing a sliver of brow and forehead. That little gap is what keeps them light. If yours hang as one closed wall, they’re really blunt bangs in disguise — and blunt bangs over fifty need a far more deliberate hand.
31. Covering the Eyes With an Overlong Center

When the center sections drag past your lashes, you spend the day peering through them. It reads as hair that needs a trim, not a style — and it hides the one feature these bangs should spotlight: your eyes.
The shortest point belongs at or just above the inner brow, opening outward. Keep that center light enough to see through comfortably and the fringe frames your face instead of shuttering it.
30. Pairing Full Curtain Bangs With a Heavy One-Length Bob
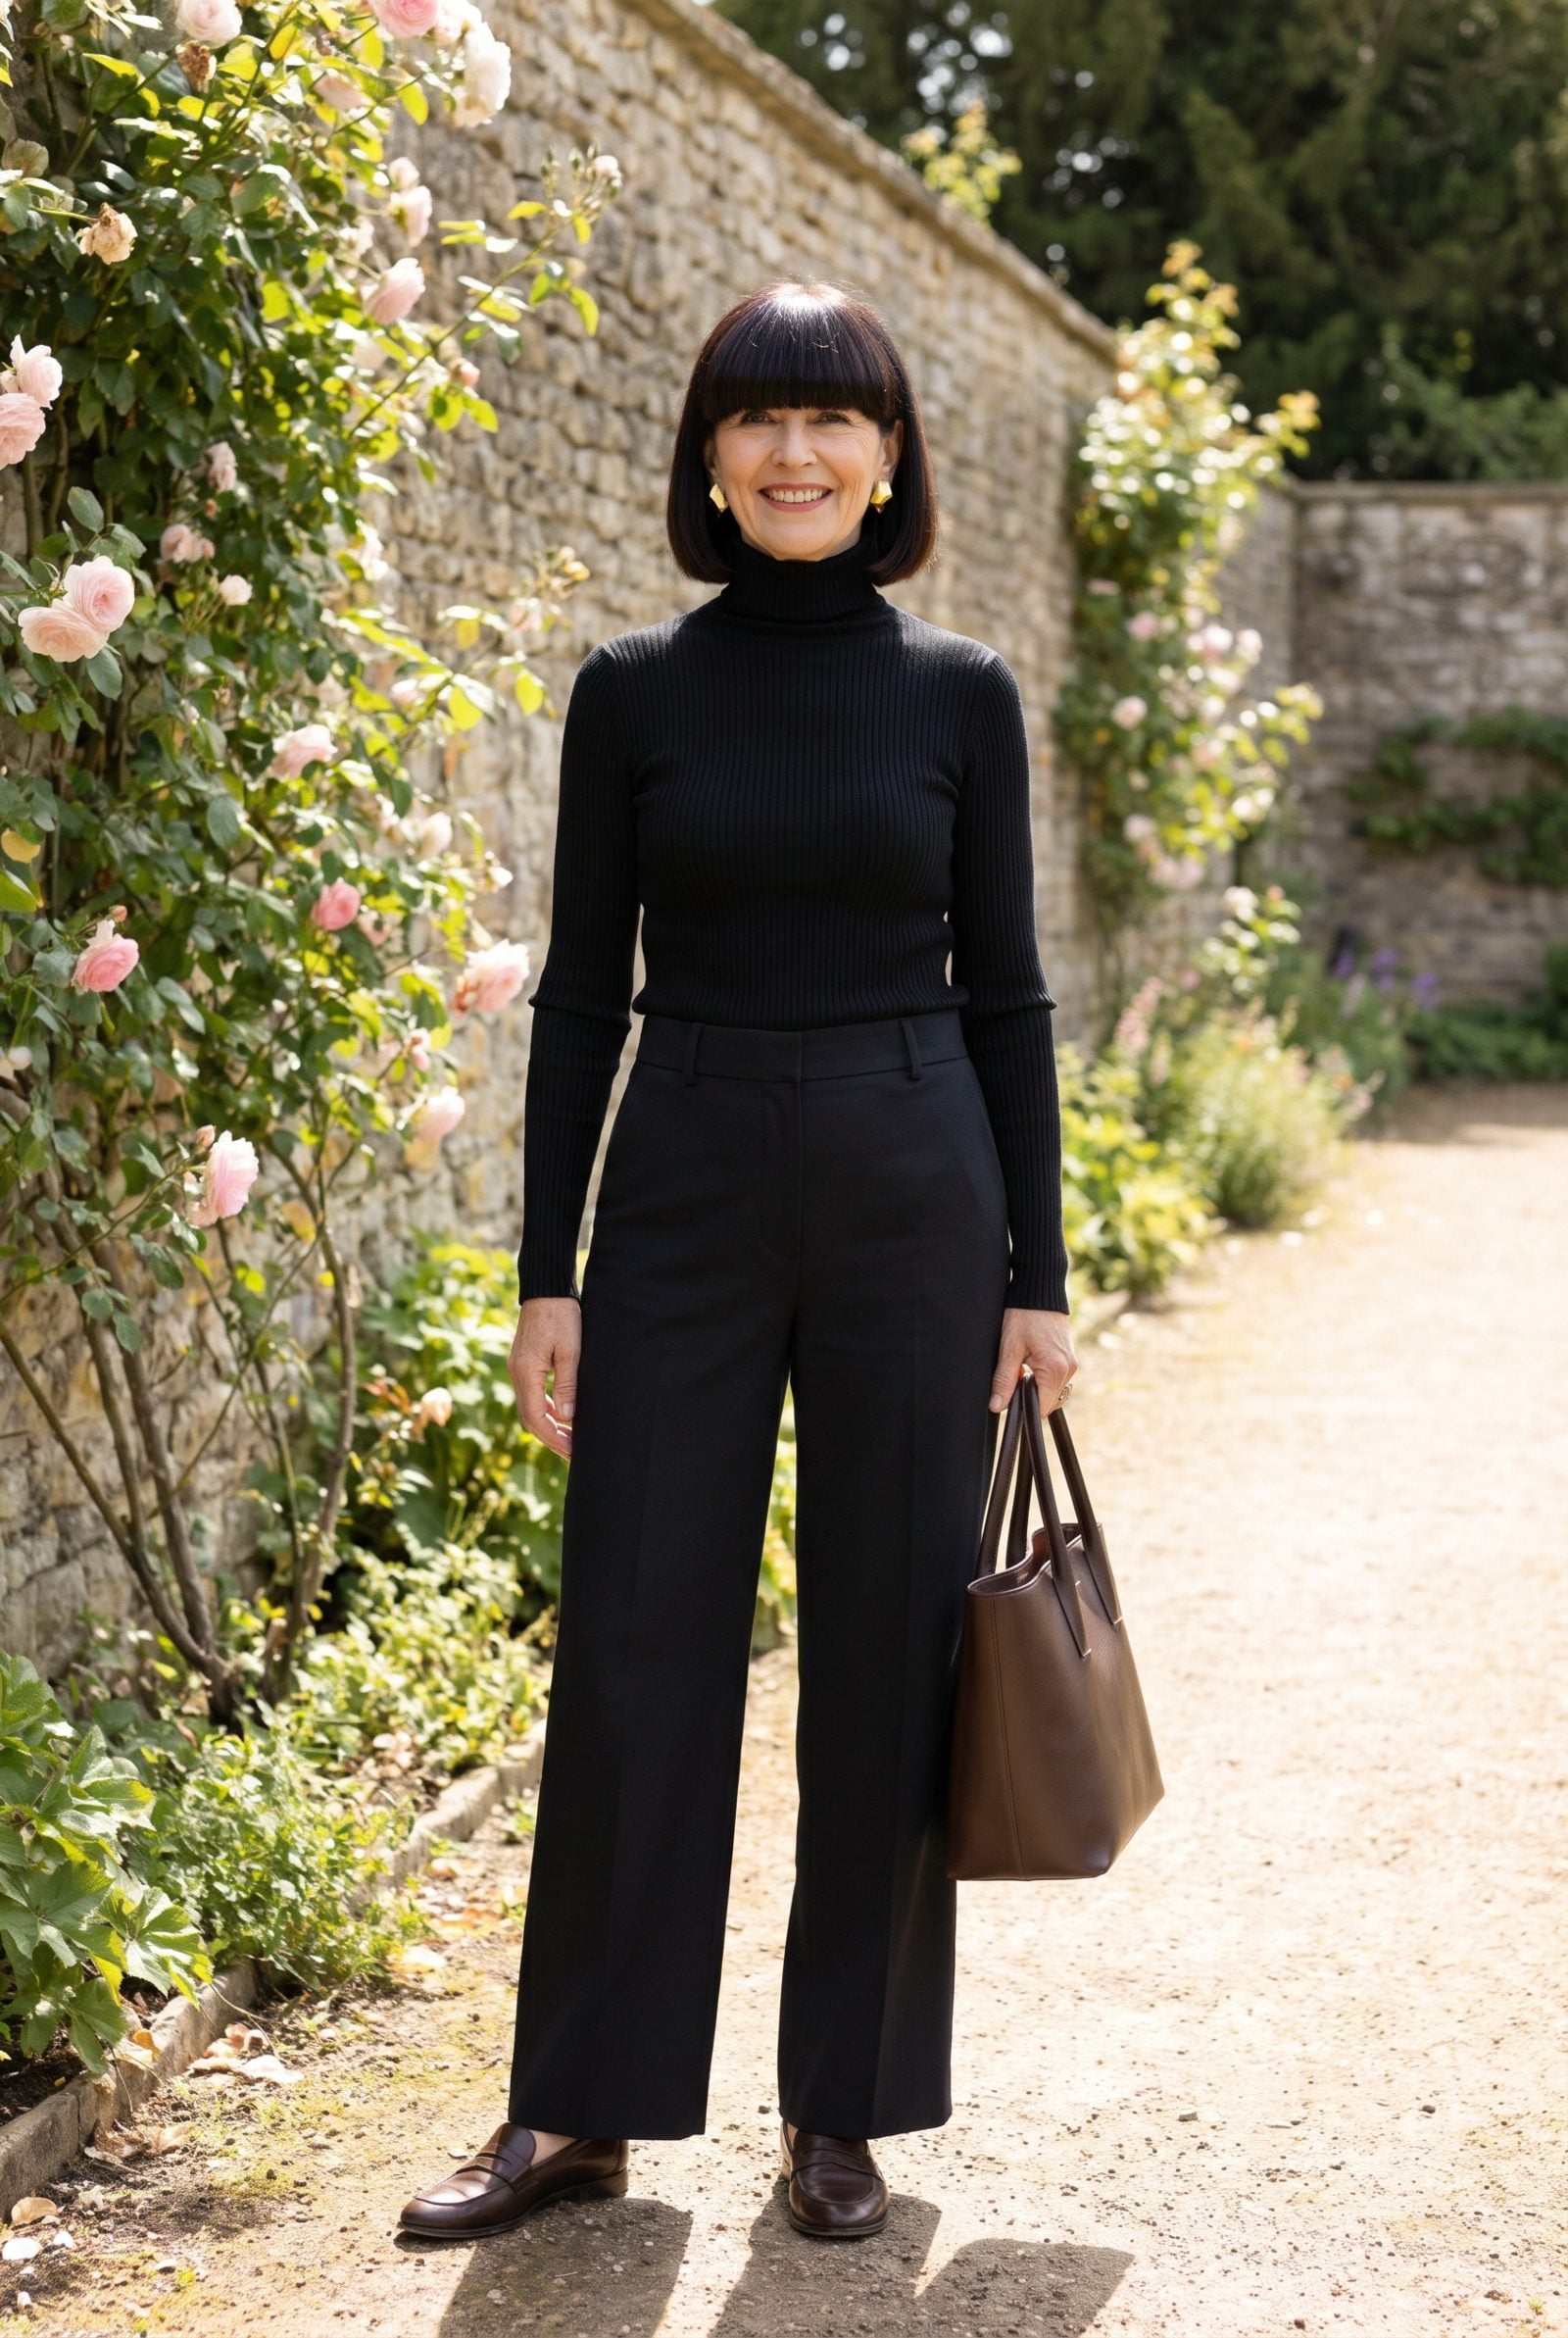
Two heavy shapes stacked together cancel each other out. A dense fringe on top of a blunt, zero-layer bob gives you a solid helmet with no air anywhere — and air is what makes this cut look current.
Want the full fringe? Then the length underneath needs some softness: a few long layers, a bit of face-framing, slightly textured ends. Weight on weight reads dated. One soft piece, one structured piece — that’s the balance that keeps the whole thing moving.
29. Pairing Wispy Bangs With Chunky Face-Framing Layers

Thin fringe beside chunky layers is a density argument you can spot from across the room. The wispy bang looks sparse next to the heavy pieces, and the heavy pieces look clumsy next to the bang.
Match the weight. If the fringe is airy, keep the face-framing airy too. Consistent density is what makes the front of the hair read as one considered shape rather than two cuts that happened to the same head.
28. Keeping the Crown Flat Behind the Fringe

You can cut the fringe beautifully and still land flat if the crown behind it collapses. A low, pressed-down top drags the whole head down and makes even a lovely curtain bang look heavy by association.
A little lift at the crown changes everything. Rough-dry the roots in the opposite direction, hit them with a round brush, or set a couple of hot rollers back from the part — any of it works. Volume behind the fringe is what makes the front look intentional.
27. Blow-Drying the Bangs Straight Down

Straight down is the fastest way to turn soft curtain bangs into a visor. Without any directional lift, the fringe hugs the forehead and the whole face reads shorter and flatter.
The fix is airflow aimed away from the face. Point the nozzle so the roots lift up and out, then let the ends fall. That one change gives you the swoop curtain bangs were invented for instead of a straight dense line across the brow.
Showing how to get fluffy, voluminous curtain bangs, one hairstylist popular on TikTok instructs “Now take a round brush and your blow-dryer and blow-dry the hair away from your face.”
26. Rolling the Entire Fringe Under as One Section

Treat the fringe as one lump and you get a helmet. Rolling the whole thing under in a single pass erases the split that makes curtain bangs flattering, leaving a rounded dome that ages the cut instantly.
Curtain bangs want two pieces moving in opposite directions, parted somewhere near the center. Split the fringe, work each side separately, and let them fall away from the nose. That gap in the middle? It’s the whole reason the style works. Lose it and you are back to a 1990s under-roll.
25. Using a Round Brush That Is Too Large

A barrel that is too big barely bends the hair at all. You spend ten minutes wrapping the fringe around it and end up with a lazy, stretched wave that drops flat by lunch.
Scale the brush to the length of the bangs. A medium or small round brush catches the shorter pieces near the face and builds the lift where it matters, right at the root. You’re setting a curve, not pressing one out.
24. Curling Both Sides Toward the Face

Curl both sides inward and the bangs close around your face like a set of parentheses, crowding the eyes and pinching the forehead. Bend them outward instead, so nothing closes in around the eyes.
Curtain bangs are named for the way they part and sweep away. Turn the iron so each side bends outward, back toward the ears. That outward motion frames the cheekbones and lifts the whole expression. Inward is for someone trying to disappear, and you are not.
23. Creating an Overly Perfect Barrel Curl

A flawless, glassy barrel curl looks like it was set and sprayed, not styled. The precision is the problem. Perfect curves read as dated and stiff rather than soft and modern.
Curtain bangs should look like they fell that way. Once you have the curl, break it up with your fingers, shake it loose, let a few pieces go slightly askew. That lived-in finish is what keeps the fringe looking current instead of like a wing frozen in time.
22. Flat-Ironing the Bangs Pin-Straight

Flat-ironing the fringe dead straight gives you a hard-edged panel that sits like a ruler across the brows. No softness, no sweep, nothing to frame the face. Just a flat curtain with a blunt bottom line.
Finish with a slight bend at the ends instead. After the iron, roll the tips out with a quick flick of the wrist, or run a round brush through warm bangs to coax a curve. That tiny bit of movement is the difference between severe and soft.
21. Turning the Ends Out Too Sharply

A gentle outward bend is good. A sharp flip is Farrah Fawcett in the wrong decade. When the ends kick up too hard, the fringe looks trapped in a time capsule rather than falling naturally.
The curve should be soft enough that you have to look twice to see it. Use a lower iron temperature and a wider turn of the wrist. You want a whisper of a bend, not a hairpin corner at the tips.
20. Leaving No Airy Separation Through the Center

No gap in the middle and your curtain bangs stop being curtain bangs. They become a heavy blunt fringe, dense across the whole forehead, reading thicker and more severe than anything you were going for.
The open center is the signature of this cut. Even a small sliver of forehead showing through the part lightens the whole thing. Push the two sides apart with your fingers while drying, and keep them falling away from each other rather than meeting in the middle.
19. Using Heavy Pomade Through the Fringe

Heavy pomade is built to slick hair down, which is the exact opposite of what fringe needs. Keep it out of your fringe and the strands stay soft, clean and evenly blended, with a light, natural finish instead of a dirty, dense look.
Fine blonde hair especially cannot carry waxy product. Switch to a light mousse or a flexible texture spray applied to the roots, not the ends. You want hold with movement, not strands glued into stiff ribbons.
18. Applying Hair Oil at the Roots

Oil belongs on the ends, never the roots of your fringe. Applied too high, it flattens the lift and leaves the bangs looking lank and greasy by the time you get out the door.
Curtain bangs live or die on root volume. A drop of lightweight oil smoothed through the very tips tames flyaways without weighing anything down. Keep it an inch away from the scalp and your fringe stays airy instead of plastered to your forehead.
17. Finishing With Stiff Maximum-Hold Hairspray

Maximum-hold hairspray does one thing beautifully: it stops motion. And that’s exactly the problem. A curtain bang reads as young and soft because it moves, breaks apart, drifts back into the face a little. Freeze it and it turns into a helmet brim.
The giveaway is the sheen: a lacquered fringe catches light in one flat plane, while a soft one like this stays matte, scattering light across separated, airy pieces. You want a flexible-hold spray, held a foot back, one light pass. Then break the fringe apart with your fingers so they fall rather than sit.
Warning against over-styling the fringe into something too rigid, a London salon founder says “Curtain bangs should feel soft and effortless, not hair-sprayed to your forehead. Heavy products or too much heat can make them look weighed down instead of light and airy”
16. Layering Dry Shampoo Until the Bangs Look Chalky

Dry shampoo on day two is a gift. On day four, with no wash in between, it can turn the fringe grayish and powdery, and on lighter or silver hair that cast is brutal. What you want to keep instead is a fringe that’s clean, glossy and still catching the light, with no dusty cast.
One short burst at the roots, brushed through, buys you a day. Pile it on to skip another wash and you buy chalk instead. If your bangs get oily faster than the rest, wash just the fringe at the sink between full washes. Takes two minutes.
15. Using Texture Powder Across the Entire Bang Section

Texture powder is wonderful at the crown, where you want lift nobody can see the source of. Through the bangs it’s a different animal, gripping every strand and holding them apart in a crunchy, stacked wedge. Leave the fringe out of it and the bangs stay soft and swingy.
Curtain bangs want weight and glide, not grip. Keep the powder behind the fringe where it builds volume at the root. The front panels should slip through your fingers, not catch on them. Dust it everywhere and your bangs end up looking braced for wind.
14. Applying Root-Lifting Mousse From Roots to Ends

Mousse earns its name at the root. The clue is right there in the label. Keep it at the root and the ends of the fringe stay soft, falling in a gentle line instead of a crispy little hook, and that softness freshens the whole fringe.
The ends frame your face. They should move. Let them.
13. Brushing Out All Natural Texture

A brush and nothing else turns long hair with a full fringe into a solid helmet, because every bit of natural break and bend that keeps the lengths soft gets combed into one dense sheet lying flat against your face. It’s the most common mistake and the easiest to fix.
Curtain bangs live on separation: the two sides sweeping apart, the lengths falling free, the slight gaps between strands. Rough-dry with your fingers, round-brush only the fringe roots to set its shape, then leave the length alone. A wide-tooth comb for the fringe, never a smoothing brush top to bottom.
12. Letting Humidity Puff Up Porous Bangs

Porous hair drinks moisture out of the air, and gray hair is often the thirstiest of all. On a damp day the bangs swell, lift off each other, and puff into a frizzy halo exactly where you wanted smooth.
A drop of lightweight oil or a humidity-blocking cream, warmed between your palms and pressed over the fringe rather than raked through, seals the cuticle so the air can’t get in. Skip the heavy serum. You need a barrier, not a coating. Gray hair that fuzzes is thirsty, not damaged, and a little moisture discipline changes everything.
11. Allowing Split Ends to Create a Fuzzy Curtain

Split ends on the body of your hair hide under the layers. On your bangs they sit three inches from your eyes in good light, fraying the bottom edge of the fringe into a soft cottony fuzz. No styling product fixes frayed hair. It’s worn out.
10. Going Too Long Between Fringe Trims

Curtain bangs have a short window where they look intentional. Grow them past the cheekbone and the sweep collapses. The panels hang straight and heavy, drift into your eyes, and the whole thing reads as a haircut you’re avoiding rather than one you chose.
A fringe trim every few weeks keeps the shape alive, and most salons do it free between cuts. Handy with scissors? A dry dusting of the ends at home holds you over. The gap between a current curtain bang and a dated one is often just a couple of weeks of growth.
9. Choosing a Reference Photo With a Different Hair Density

You bring a photo of a fringe you love, the stylist cuts it exactly, and it looks nothing like the picture. Nearly always the culprit is density. A curtain bang that swings full and glossy on thick hair goes thin and sheer on fine hair, showing scalp where the photo showed fullness.
Reference photos are a starting point, not a blueprint. Tell your stylist your hair type and ask how the shape adapts to it. Finer hair often needs the shape adjusted to build the illusion of weight, and a cut designed for your density beats a copy of someone else’s every time.
8. Copying Straight-Hair Bangs on Tight Curls Without Adaptation

Curls shrink. That’s the whole lesson, and the one most straight-hair fringe cuts ignore. Cut to brow length wet, a tight coil springs up to mid-forehead dry, and the curtain bang that was supposed to frame your cheeks now sits high and compact above your eyebrows.
A fringe for curly hair gets cut with shrinkage built in, usually dry or curl-by-curl, left longer than it looks like it needs to be. The sweep reads completely differently on coils, soft and rounded rather than straight and parted, and a stylist who cuts curls knows how to shape it so the curl works for you instead of against the picture you brought.
Find someone who specializes in your texture. Worth the drive.
Asked whether curtain bangs work on curly hair, a Glendale salon stylist says yes, and explains “The key is a dry cut so your stylist can see exactly where each curl falls, plus a longer starting length to account for shrinkage.”
7. Ignoring Thinning Hair at the Temples

The center of a curtain bang can sit full while the temples quietly give out, and that mismatch ages the whole fringe. Thin hair at the hairline wants support, not a heavier center yanking attention straight to the gaps.
Go softer. A feathered edge at the temple does far more than a solid wall of fringe, and point-cutting the ends while leaving a touch of extra length there lets the sparse sections read as deliberate wispiness rather than a bare patch. You fake density by letting the fringe breathe exactly where it’s weakest.
6. Using Extensions to Overfill the Bang Area
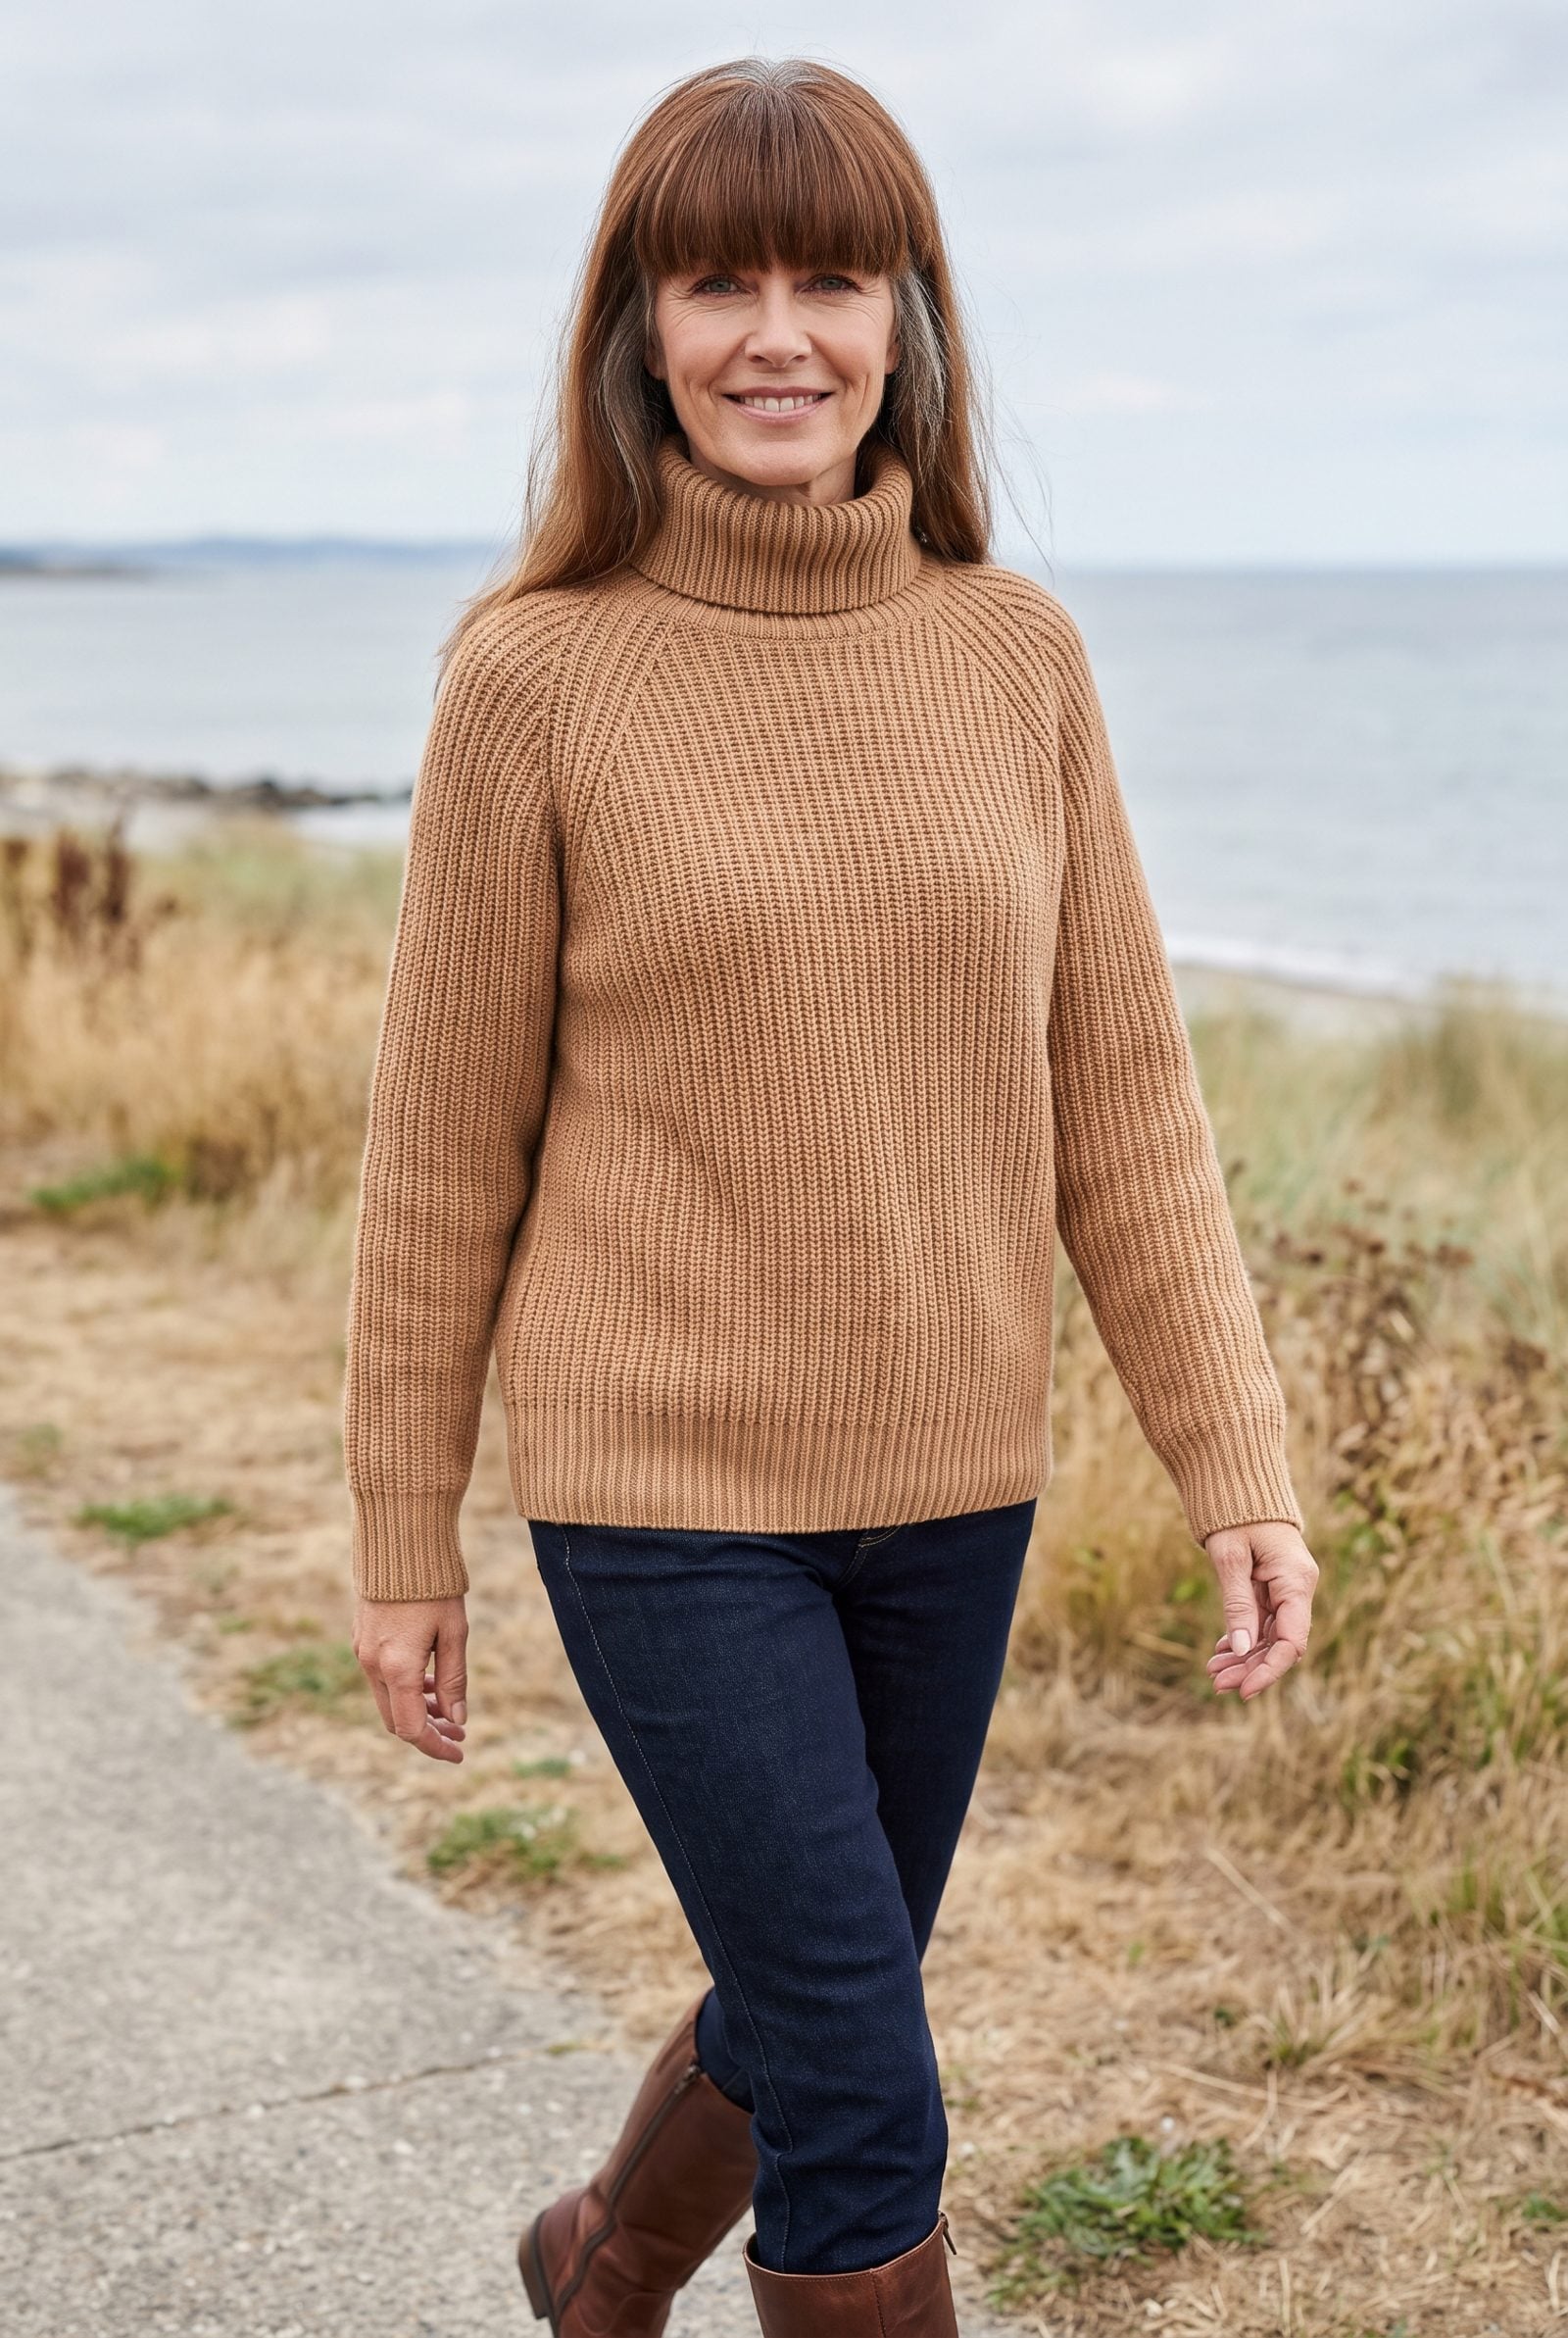
More hair is not more softness. Pack the bang area with extensions and you build a curtain so dense it quits acting like a fringe and starts acting like a visor, flat and immovable against the forehead.
Fine or thinning hair looks younger when the fringe stays light enough to shift as you turn your head. A curtain bang earns its name because it parts and sways; overfill it and you kill the one quality doing all the work. If density really is the goal, a few wefts tucked along the crown read far more natural than a slab of added hair at the front.
5. Placing a Dark Solid Color Across the Entire Fringe

One flat dark shade across the fringe does the opposite of soft. It lays down a solid band of color that borders the face like trim around a doorway, hard-edged and heavy, and it picks up every line it sits near.
Dimension keeps a fringe looking like hair instead of a helmet. Thread a few lighter strands through the curtain, a shade or two up from the base, and light travels through rather than bouncing off a wall. Go too dark and you can spend a month wondering why you look exhausted in every photo.
4. Adding Chunky Contrasting Highlights to the Bangs

Chunky highlights through a fringe read as a time stamp. Wide blonde ribbons against a dark base slice the curtain into stripes, and striped bangs fight the soft, face-framing shape the cut is supposed to deliver.
Fine, blended babylights do the softening a curtain bang needs. Drop them around the face so light gathers where it flatters, aiming for a gradient rather than a flag. Keep the lightest pieces near the ends where they catch the cheekbone, and let the root stay closer to your natural depth so the whole thing moves as one soft sweep.
3. Ending the Fringe at the Top Rim of the Glasses

When the fringe stops dead at the top of your frames, everything stacks: bang, rim, brow, all crammed into one horizontal band across the eyes. It chops the face and crowds the glasses instead of working with them.
A curtain bang around glasses wants length that drops past the frame and sweeps below the temple of the eyewear, so the two layers overlap softly. Longer front pieces grazing the cheekbone open the face back up and let the glasses stand as their own feature. Wear frames daily? Bring a pair to every cut and have the length checked against them. Nobody does this. Everybody should.
2. Using Rich Conditioner Too Close to the Bang Roots

Rich conditioner belongs on the ends, not an inch from your fringe roots. Fine bangs have almost no weight to carry, so a heavy cream at the scalp flattens them into limp strips that cling to the forehead.
Keep conditioner from the mid-lengths down and let the roots of the fringe stay clean and light. The lift you need at the front comes from the root being free to stand away from the skin. A curtain bang reads soft when it sweeps, and it can only sweep when it isn’t glued down by product it never needed in the first place.
1. Failing to Clarify Product Buildup From Fine Bangs

Dry shampoo, hairspray, and styling cream pile up fastest on the fringe because you touch it, reset it, and re-spray it more than any other section. The result is a dull, waxy coat that makes fine bangs clump and sit stiff.
A clarifying wash every week or two strips that film and brings the soft separation back. Buildup is sneaky. It dulls the shine so gradually you end up blaming the haircut instead of the residue sitting on it. Clean, product-free fine hair catches light and moves in individual strands, which is the whole look you were chasing.